Category: Knowledgebase

Find if pNFS is enabled on NFS client

On the NFS client, execute the following command and in output check, if pnfs=not configured is present.

egrep "nfs(v)?4" /proc/self/mountstats
device NFS-Server-IP:/mnt/path-shared mounted on /mnt/point with fstype nfs4 statvers=1.2
nfsv4: bm0=0xfdfbbbff,bm1=0x40f9bui3e,bm2=0x906,acl=0x3,sessions,pnfs=not configured

Disable or Enable Journaling On ext4 Filesystem

You can only use the ordered journaling method on a Linux Server. First check if the journal feature is enabled on ext3/ext4 filesystem with the following command:

tune2fs -l /disk-path

Check the output of the above command for has_journal which indicates the journaling is enabled on the filesystem.

Filesystem features: has_journal ext_attr resize_inode dir_index filetype needs_recovery extent flex_bg sparse_super large_file huge_file uninit_bg dir_nlink extra_isize

To disable journaling use the command:

tune2fs -O ^has_journal ext4-device-name

If you want to enable (on device without prefix or with + prefix) then run the command:

tune2fs -O has_journal ext4-device-name

tune2fs -O +has_journal ext4-device-name

Tip from ‘man tune2fs’ page: Filesystem features prefixed with a caret character (‘^’) will be cleared in the filesystem’s superblock; filesystem features without a prefix character or prefixed with a plus character (‘+’) will be added to
the filesystem.

Backup old files before overwriting in rsync

By default, rsync overrides old files in the destination server/folder. To resolve this use the –backup flag in rsync.

rsync -a –backup –backup-dir=”/src-old-files” /usr/src/ root@85.17.219.154:/src-backup/

The above rsync command will copy files from local server /usr/src to root@85.17.219.154:/src-backup/. If some files are overwritten in root@85.17.219.154:/src-backup/, these will be backed up in root@85.17.219.154:/src-old-files first before they are being overwritten.

How to check progress of the rsync job

  • You can add the progress option with rsync command:

rsync -a --progress /media/backup-folder/
sending incremental file list
created directory backup

  • or you can add the -P flag in rsync command as below:

rsync -a -P /media/backup-folder/
sending incremental file list
created directory backup

Note that the -P option includes both –partial and –progress rsync options.

How to resolve rsync error: some files/attrs were not transferred

The following error is generated when rsync is run with the -X option (preserve extended attributes)

rsync -axHAX --delete /. /tmp/selinux/.
rsync: rsync_xal_set: lsetxattr("selinux","security.selinux") failed: Permission denied (15)
rsync error: some files/attrs were not transferred (see previous errors) (code 31) at main.c(1039)

To resolve this error, filter the ‘/selinux’ filesystem from the command. Run rsync as below;

rsync -axHAX --delete --filter="- /selinux" /. /tmp/selinux/.

It is suggested to also excluded /var/run, /var/lock, /proc and /dev from rsync command.


vnc kali

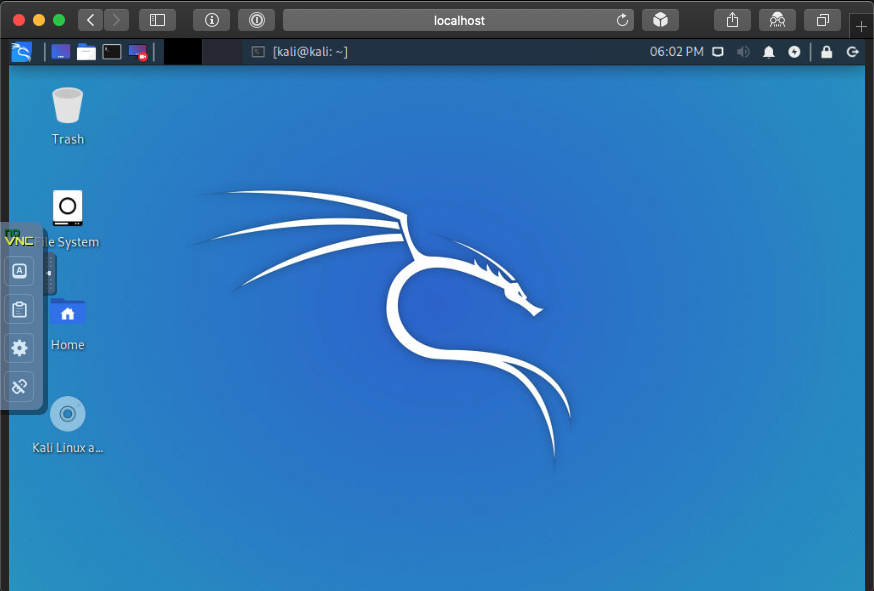
How to Install and Configure VNC on Kali Linux 2020.2 and Debian 9

These steps have been tested to install VNC on Kali Linux and Debian 9. You may encounter errors in installing tightvncserver with apt-get. This guide covers this issue.

  • Login to your server as root.
  • Install VNC server with apt-get install tightvncserver
  • If you get the following error, then you can install tightvncserver from Debian 9 or Kali installation ISO image.

root@server:/home/user# apt install tightvncserver -y
Reading package lists... Done
Building dependency tree
Reading state information... Done
Package tightvncserver is not available, but is referred to by another package.
This may mean that the package is missing, has been obsoleted, or
is only available from another source

E: Package 'tightvncserver' has no installation candidate

  • To install tightvnc from ISO image, Mount Debian or Kali image on /media/cdrom with mount -t iso9660 /dev/sr0 /media/cdrom -o loop

tightvnc .deb packages [tightvncserver_1.3.9-9.1_amd64.deb xtightvncviewer_1.3.9-9.1_amd64.deb] is located in /media/cdrom/pool/main/t/tightvnc

  • Change directory to /media/cdrom/pool/main/t/tightvnc with cd /media/cdrom/pool/main/t/tightvnc
  • Install tightvncserevr with dpkg -i tightvncserver_1.3.9-9.1_amd64.deb
  • Edit xstartup in /home/youraccount/.vnc/xstartup with vi and add following code:

#!/bin/sh
unset SESSION_MANAGER
unset DBUS_SESSION_BUS_ADDRESS
startxfce4 &
[ -x /etc/vnc/xstartup ] && exec /etc/vnc/xstartup
[ -r $HOME/.Xresources ] && xrdb $HOME/.Xresources
xsetroot -solid grey &
vncconfig -iconic &

  • Start vnc server by executing the following command:

vncserver

  • You will be prompted to enter and verify vnc password. Make sure your password is less than 8 characters else it will be truncated to 8 characters.
  • After vnc password is set you will have the option to set a view-only password which is optional.
  • You may kill any instance of vncserver by executing commands vncserver -kill :1
  • ~/.vnc/xstartup must have executable permission set. You may set these permissions with the command chmod +x ~/.vnc/xstartup
  • If you did the above steps correctly, TightVNC server is already running on your server waiting for an incoming connection.
  • To connect to vnc server from your local PC, install Tight vnc viewer. Open vncviewer and enter the IP address and listening port on the server 87.79.209.99::5906
  • If your vncserver is listening on port :1 then you should enter 87.79.209.99::5901

Why yum module list show @modulefailsafe

The command yum module list output @modulefailsafe

# yum module list --disablerepo=\*
@modulefailsafe
Name Stream Profiles Summary
389-ds 12 [e] 209 Directory Server (base)
ant 1.9 [e] common Java build tool
httpd 2.2 [e] common, devel, mini Apache HTTP Server

In the case of local repositories, Re-build repodata either with reposync --download-metadata or modifyrepo to include the modules.yaml into the repomd.xml

The issue is usually caused when the module metadata is not available. Unavailability of module metadata happens when the user removes a .repo file or disables a repository via –disablerepo / –repoid or repository is unavailable and has option skip_if_unavailable=true.