Category: Knowledgebase

ssh connection

SSH connection fails with messages “no hostkey alg”

The SSH connection from CentOS 6 to CentOS 8 fails while running CentOS 8 in FIPS mode.

  • Getting the following ssh debug output:

debug2: mac_setup: found hmac-sha1
debug1: kex: server->client aes128-ctr hmac-sha1 none
debug2: mac_setup: found hmac-sha1
debug1: kex: client->server aes128-ctr hmac-sha1 none
no hostkey alg

  • To resolve this issue, on CentOS 6 you should generate ECDSA host keys with correct permissions as below.

ssh-keygen -t ecdsa -f /etc/ssh/ssh_host_ecdsa_key -C '' -N ''
chmod 600 /etc/ssh/ssh_host_ecdsa_key
chmod 640 /etc/ssh/ssh_host_ecdsa_key.pub
restorecon /etc/ssh/ssh_host_ecdsa_key.pub

  • To allow ssh clients to accept ECDSA host keys, add the following in /etc/ssh/sshd_config file on the ssh server.

Host <hostname/IP>
Hostkeyalgorithms ecdsa-sha2-nistp256,ecdsa-sha2-nistp384,ecdsa-sha2-nistp521

CentOS 6 servers can connect to CentOS 8 in FIPS mode using ECDSA keys (not created and accepted automatically).

CentOS 8 only supports SHA2 hashes for RSA host keys, hence they are incompatible with CentOS 6’s SHA1-based RSA host keys. However, CentOS 6 computers can connect to CentOS 8 in FIPS mode using ECDSA keys (not produced and accepted automatically).

telnet

How to configure Telnet in Linux

For security reasons, It is advised to use secure SSH rather than Telnet to connect to a server. When you use Telnet, your passwords are sent through the network in plain text. As a result, the root user is not permitted to use Telnet by default.

  • Make sure you have the necessary telnet-server and telnet RPMs installed before using Telnet.

# rpm -qa | grep telnet
telnet-server-3.13-26.EL8
telnet-3.13-26.EL8

  • If you don’t have the telnet-server or telnet packages installed, you can use the RPMs from your installation disk to install them, or you can use the yum program to download and install the package.

# up2date telnet-server telnet

# yum install telnet-server telnet

  • Add the service to firewalld.

# firewall-cmd --add-service=telnet --zone=public

  • If you want to keep this rule permanent, add the –permanent flag to the command.

# firewall-cmd --add-service=telnet --zone=public --permanent

  • Reload the firewall rules.

# firewall-cmd --reload

  • Add the service to SELinux (not required with selinux-policy-3.12.1-77 or later)

# semanage port -a -t telnetd_port_t -p tcp 23

  • Start and Enable the telnet service

# systemctl start telnet.socket
# systemctl enable telnet.socket
or
# systemctl enable telnet.socket --now

  • Test the telnet server.

# telnet server2
Trying 3.3.3.3...
Connected to 3.3.3.3.
Escape character is '^]'.Kernel 3.10.0-327.el7.x86_64 on an x86_64
server2 login: telnet-user
Password:

selinux

Unable to disable SELinux

The SELINUX=disabled option in the /etc/selinux/config file was removed from the kernel with the RHEL9.0 release. The system boots up with SELinux enabled but no policy loaded if SELINUX=disabled is defined in /etc/selinux/config.

  • The only way to turn it off is to run the kernel with the selinux=0 option.
  • Use grubby to ensure that the bootloader always boots with selinux=0.

# grubby --update-kernel ALL --args selinux=0

  • To restore SELinux to its default state, follow these steps.

# grubby --update-kernel ALL --remove-args selinux

Please note support for disabling SELinux through /etc/selinux/config has been removed in CentOS 9, and AlmaLinux 9.

error nginx

nginx: [emerg] socket() [::]:8080 failed (97: Address family not supported by protocol)

When starting nginx, you may get the following error.

nginx: [emerg] socket() [::]:8080 failed (97: Address family not supported by protocol)

This indicates that the server’s IPv6 is disabled, causing the service to fail owing to an unsupported address family.

  • Search for the following directive in the NGINX configuration file to resolve this error.

# listen [::]:80;

  • Replace the above with the following.

listen 80;

nginx

How to configure NGINX to display 404 errors locally

The error_page directive handles nginx problems, whereas proxy_intercept_errors controls whether proxied replies with codes greater than or equal to 300 should be delivered to a client or intercepted and redirected to nginx for processing.

Regardless of the http status code, nginx will return whatever the proxy server returns by default.

proxy_intercept_errors on;
error_page 404 /404.html;

load balancing nginx

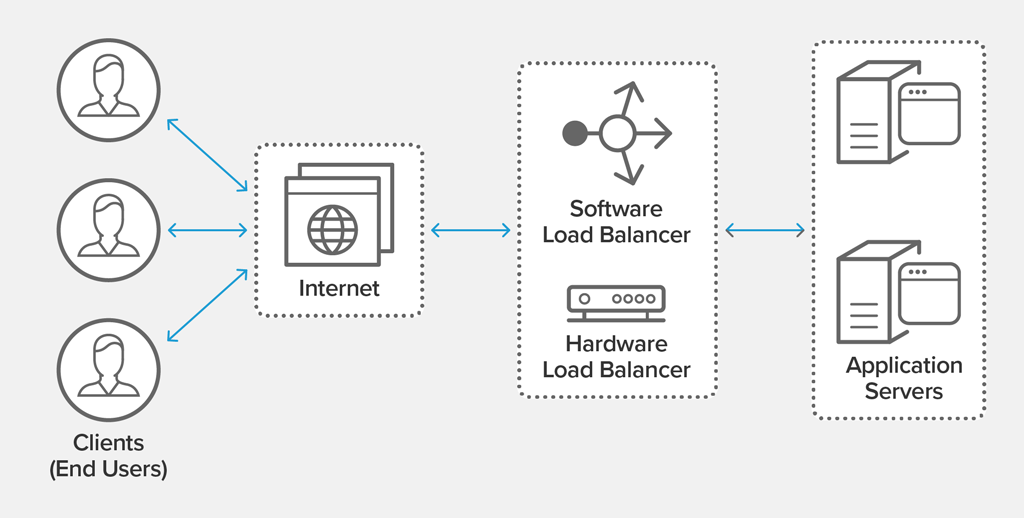
Difference between NGINX load balance methods

NGINX Open Source supports four load‑balancing methods.

  • Round Robin
  • Least Connections
  • IP Hash
  • Generic Hash

Round Robin

Requests are spread uniformly across the servers, taking into account server weights. This approach is used by default (there is no way to turn it off).

upstream backend {
# no load balancing method is specified for Round Robin
server backend1.example.com;
server backend2.example.com;
}

Least Connections

A request is delivered to the server with the fewest active connections, again taking into account server weights.

upstream backend {
least_conn;
server backend1.example.com;
server backend2.example.com;
}

IP Hash

The client IP address is used to determine which server a request is forwarded to. In this situation, the hash value is calculated using either the first three octets of the IPv4 address or the entire IPv6 address. Unless the server is unavailable, the approach ensures that requests from the same address are routed to the same server.

upstream backend {
ip_hash;
server backend1.example.com;
server backend2.example.com;
}

If one of the servers has to be withdrawn from the loadbalancing cycle momentarily, it can be designated with the down option to keep the existing hashing of client IP addresses. Requests that this server was supposed to handle are automatically routed to the next server in the group.

upstream backend {
server backend1.example.com;
server backend2.example.com;
server backend3.example.com down;
}

Generic Hash

A user-defined key, which might be a text string, variable, or a combination, determines which server a request is sent to. For instance, the key could be a URI or a coupled source IP address and port, as in this example.

upstream backend {
hash $request_uri consistent;
server backend1.example.com;
server backend2.example.com;
}

The hash directive’s optional consistent parameter enables ketama consistent hash load balancing. Based on the user-defined hashed key value, requests are dispersed uniformly among all upstream servers. Only a few keys are remapped when an upstream server is added to or withdrawn from an upstream group, reducing cache misses in load-balancing cache servers or other applications that store state.

Note: NGINX Plus adds two more methods, but we don’t support them because they’re part of their enterprise package.

recover lv

Recover LV or VG after running lvreduce, lvremove, lvresize

Before applying a change to a logical volume (LV), it automatically creates a backup of the volume group (VG) and even an archive of the logical volume on which the operation is performed. This enables the restoration of the lost logical volume from the archive.

  • To restore the LV, first fund the LV in the archive. In the below command, [VG] is the name of the volume group from which you want to restore LV. This command will display all available backups for the VG.

# vgcfgrestore -l [VG]

  • Grep the string ‘command_executed’ from the output of the above command by appending the grep command as follows.

# vgcfgrestore -l [VG] | grep -A2 -B2 "<command_executed>"

  • Copy the filename of backup that is your logical volume. You can pinpoint your required LV by reading the description and timestamps.
  • Test the archive using the following command.

# vgcfgrestore --test -f <archive_file_path_here> [VG]

  • Finally, restore LV/VG as follows.

# vgcfgrestore -f <archive_file_path> <VG name>

  • Unmount the volume, reboot the server, and remount volume